Sorry for the lack of recent update. In fact, I am now the proud father of a little baby girl, so that's why !
I had some time between diapers and feeders to paint some things and finish other projects.
Here is a quite long update on my current works :
Jessie Adams Bertha (the Resistance)
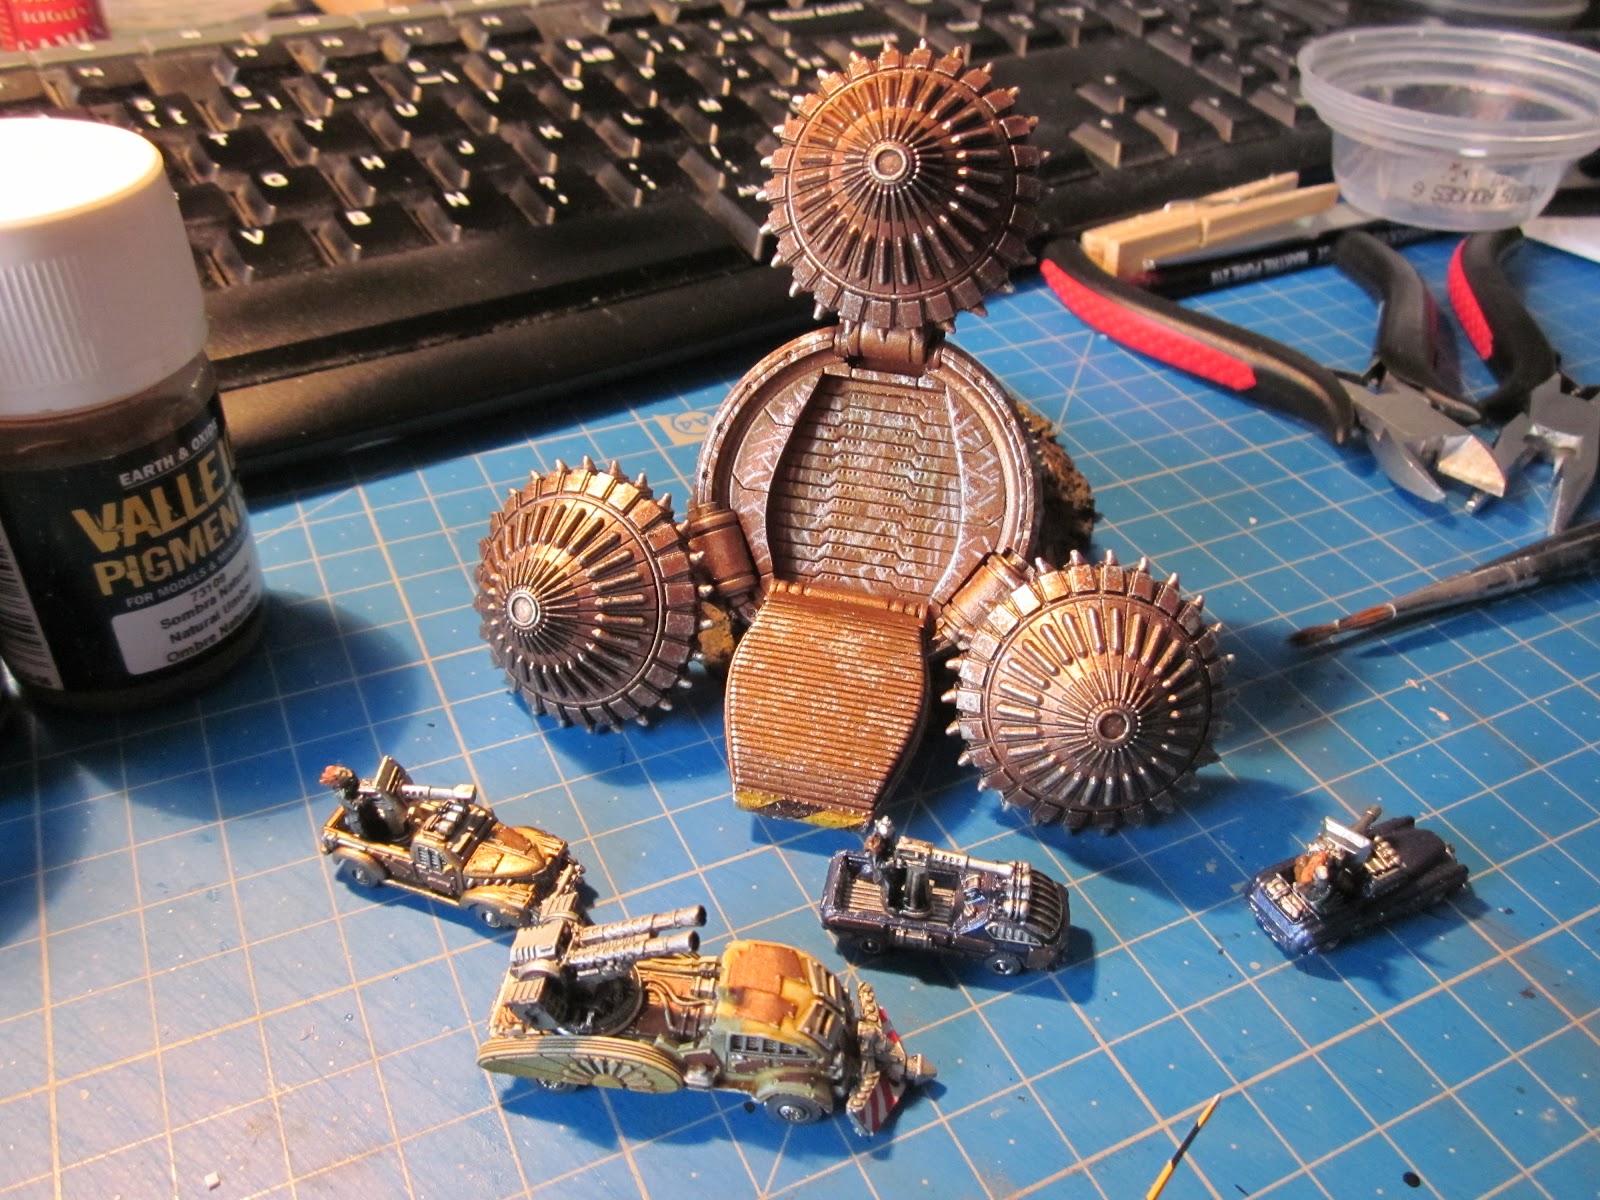
First I had a shot at Adam's Bertha Giant Drill :
The most difficult part was magnetizing the thing. I don't know if I were to do it again if I had to. The moving parts are quite massive and 2mmx2mm magnets are just too weak to really hold them. It works but the rotating parts can fall quite easily when handling the miniature.
 |
| Bertha right next to Jocasta Caine's Hera. That drill is really really big. |
 |
| I have 3 regular drills, so I had some practice on rusted metal and stuff ! |
 |
| As per usual, everything is on scale. Wagons can easily come from the drill, as does Jacksons... |
I painted the thing with mostly the same techniques and colors I used on my other 3 drills : rust from vallejo model air, steel from vallejo model air, armor wash and soft body black wash from secret weapon.
 |
| "Behemoth Robotic Tunneler mark A" |
 |
| Do not be alarmed by the brush, I do not paint with this one, only use it for pigments (and maybe some rough drybrush...) |
I also used pigments on the rubble part of the "base". It worked very well. I tested it on a piece of scenery first. Fixation was first done with 95° alcohol.
 |
| Pigments from vallejo. Easy to use, really nice dusty look, perfect for this kind of work |
 |
| There are some hazard stripes on the ramp... |
 |
| Opened and ready to let the undergrounds units emerge... Now I should really put some pigments on those rotating parts... |
Foley, prince of New Troy
Also I did some more shots of Foley because, hey, he's just too awesome !
Eden's Dinosaure (Scourge)
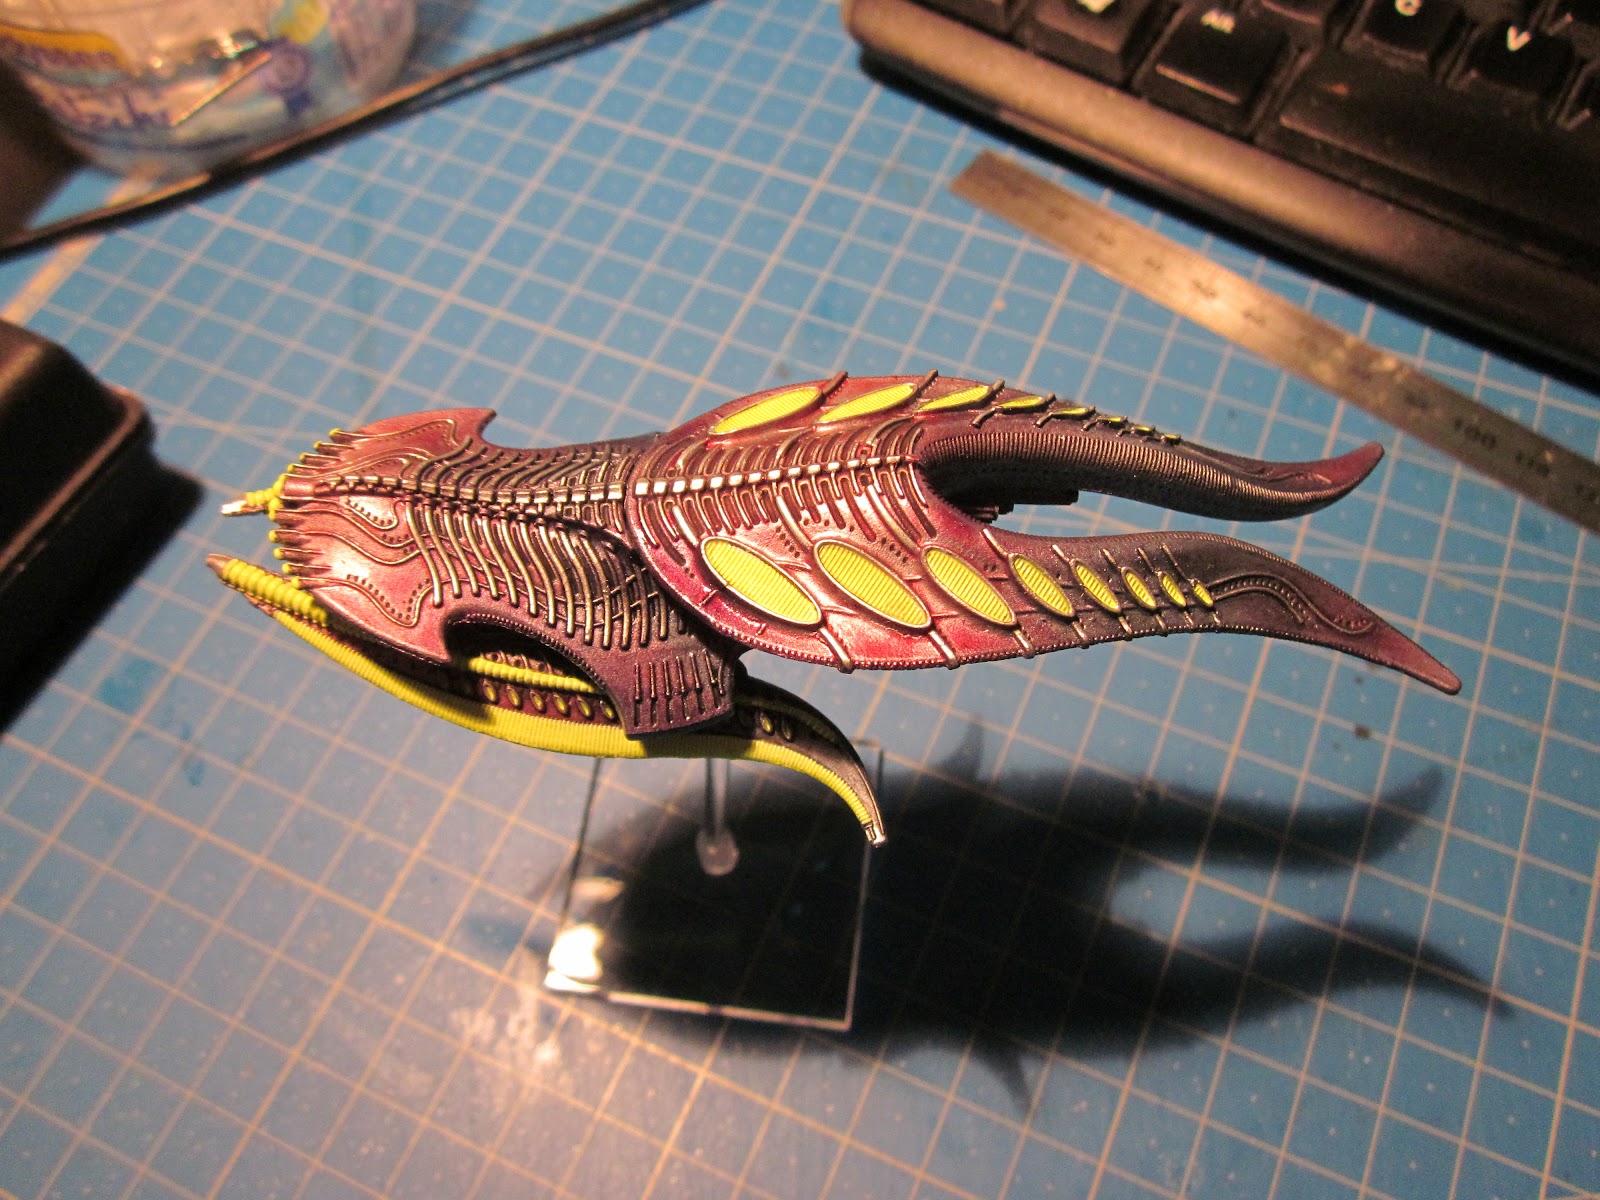
I also had the time to work on Eden's Dinosaur, testing things for my upcoming DFC Scourge Fleet. I am quite happy with the way the red and blue wash interactted. It's possible the picture is not showing it the way it should... (model still need some work on the yellow parts).
 |
| Red - blue - red - blue... |
 |
| I need to work on that yellow. I intend to do some kind of gradient on the lower parts and some drybrushing on the vents. |
Testing Pigments
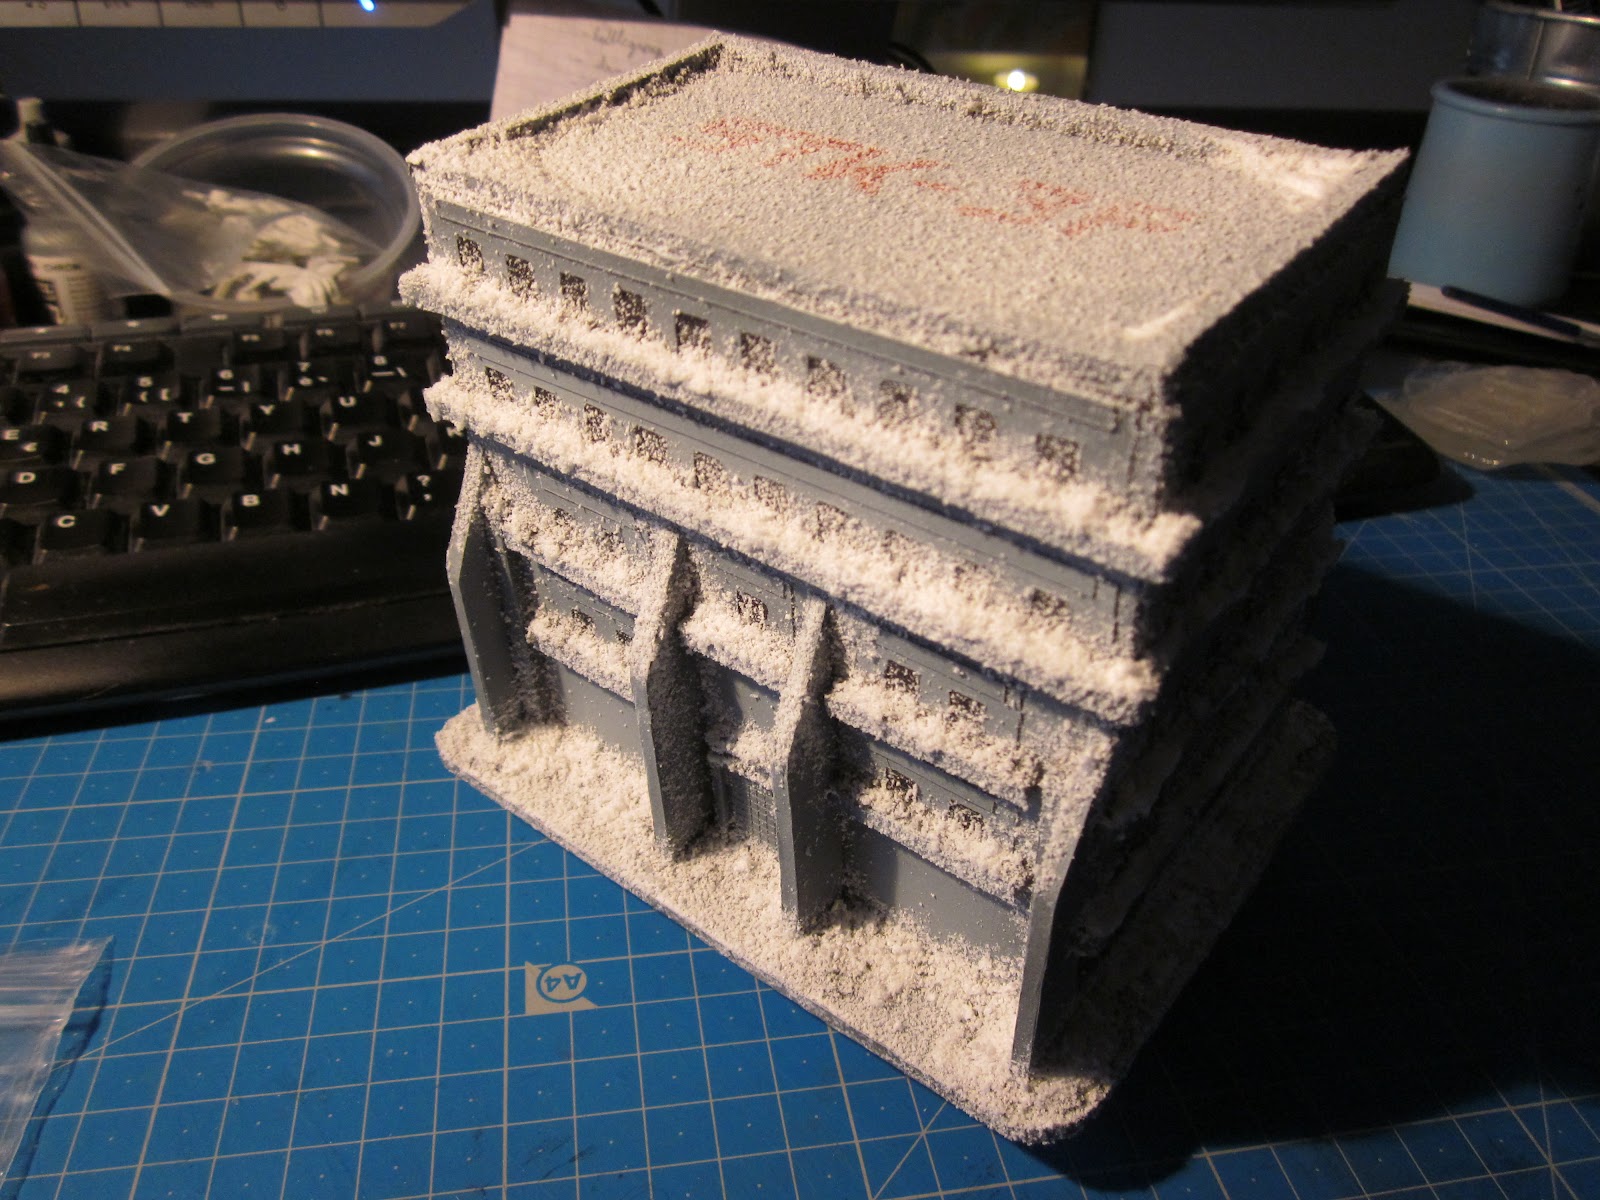
Here is my scenery piece that I used for testing pigments. It's to be used when a building is destroyed in the game, leaving a 1" tall footprint. Built from 3 mm foamcore sheets.
 |
| Testing pigments just on the left part at first |
 |
| Pigments all over the scenery, and it looks great. But it needs fixing by spraying alcohol |
First big project : ruined building
Here is one of my major project : I bought some resin building pieces from hawk to improve my infantry bases. When done, I realized I had quite a few, but not enough to build a full building, so I had this idea : why not build "
half" a building ? I also bought some n-scale office furniture for the same purpose, so that was the perfect opportunity to show it ! One last word, consider this as the
prototype of something larger (but who knows when I will find time to work on it ?)
 |
| I've painted all the outer walls first. I failed to paint all the roof tiles of a similar grey, duh ! But it didn't really mattered in the end... |
 |
| the most ruined wall. The broken parts are made from greenstuff, as I instant molded what I needed to get a worn and damaged look. |
 |
| I also glued the inner details (windows, pillards, doors) from plasticard, then painted them before final assembly |
 |
| Building after assembly. There was a HUGE problem with the roof, that was tipped by about 3mm due to bad measuring and bad planning. |
 |
| Nice building ! |
 |
| Something happened there... maybe a Hades took a bite ? |
 |
| This doesn't look very safe... I wouldn't want to be the one searching for an objective in there... |
 |
| Building after correcting the roof problem, and adding some more roof details. I also used some pigments on the walls and interior. |
 |
| I had to rip the roof from the walls with my bare hands. I was really nervous about doing this, but as I couldn't find sleep knowing that there was such a huge issue, it had to be done! It went well luckily in the end. |
 |
| I still need to work on the inner parts by weathering it with pigments. |
 |
| Second floor (blue and grey stripes) painting failed miserably and I had to repaint it with brushes. I hope pigments will hide most of the damage... |
 |
| Pigments on the roof already done (vallejo rust, grey slate light and dark) |
Painting my shaltari (new paint scheme)
Then, I decided to complete my already near complete collection of DZC goodness, and build a real shaltari army. I already painted a copper/red starter set a few month before, but I am not quite satisfied with it. I decided to use colors my other armies doesn't use : black and green. But I wasn't ready for painting green again (having a humongous dark angels collection of miniature, yes I even painted a full company...). So here my test subject, and I have to say that I am very, very, very satisfied with the result !
 |
| First, this was my previous go at shaltari : not that it was bad, but I wasn't entirely convinced. |
 |
| Here is my test subject for my new paint scheme, and I really really like it. I think it's ominous and sinister in a very cool way, I even did some OSL on the gems and sensors and it "glows" just fine ! |
 |
| Paints : vallejo model air : black metal - vallejo game : scorpion green, green ink |
 |
| the next batch is following slowly... very slowly |
Another big project : a frozen EAA destroyer
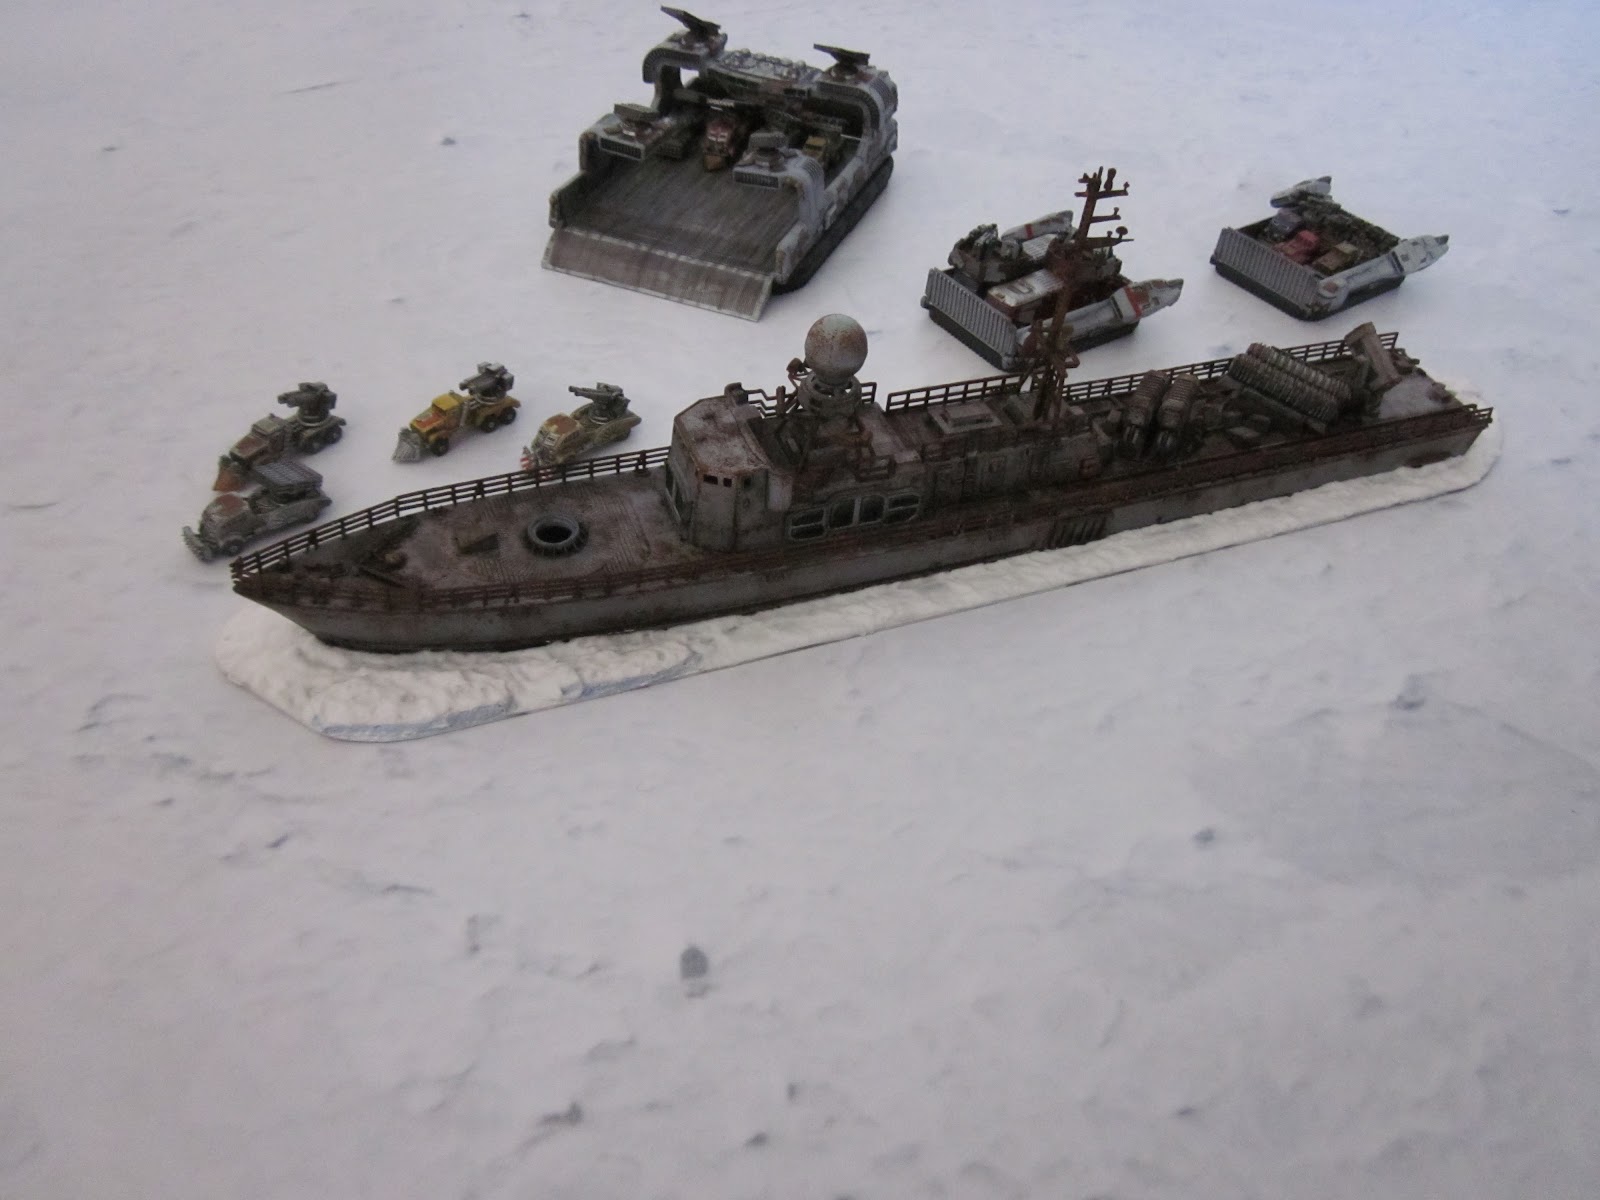
Last but not least, my other very big project, that was in the back burner for quite a long time (one or two years at least). I bought a ship model and decided to use it as a frozen, grounded military ship. It's 1/142 scale, so just about right for DZC. It took me quite a few hours to get it completed but I like the result. The main turret is not finished yet as I had to change the cannon (too thin) and it needs some paint. I also planned to spend some more time on the snow to improve it a bit. But it's almost done !
Painting was done with a vallejo primer spray white (worked quite well), then preshading with black primer. Light blue grey from vallejo model air for base color, then a gloss varnish to protect and ease next steps. Global wash with diluted black wash. Then weathering with blister foam and burn umber from vallejo model air. Then I used track rust pigments from AK interactive. Fixating was done with 95° alcohol. A last sating varnish to protect everything and then I worked on the snow with PVA glue and snow from woodland scenics.
 |
| the frozen destroyer and some resistance units to show the scale of the thing ! |
 |
| when a Leviathan hovercraft seems "small" that does mean something, doesn't it ? |
 |
| Turret is missing, need to do some painting ! Some resin parts from antenocitis to add some futuristic looking windows on the cabin |
 |
| I can't wait to use it in a game as a central piece or a special scenario ! |
 |
| I also tested some snow effect spray from model mate (top base recieved it) |
 |
| In fact that's not bad looking, but even after spraying some matt varnish on it, flakes are coming of from it whenever I touch it... |
 |
| Another test of the snow effect spray. I don't think I will use it. Too fragile to be handled afterwards |
Until next time...
That's it folks, everything I did in the last few months (and I think that's quite some work). There are still some things to do here and there, but that's mostly just some finishing. Also, I have a hard time finding time to use my brush as my baby girl is requiring my right arm most of the time, and I haven't find a way to paint properly with my left hand or my teeth yet...